Showing posts with label diy. Show all posts

Sunday, July 21, 2013

Decor Inspiration: Madalyn's Room.

Since I'm moving pretty soon, my mind has been going c r a z y with decoration ideas! And of course, where is the first place I go? ETSY. One room I'm particularly excited to decorate is Madalyn's room. She hasn't had her own bedroom since we moved out of my apartment about a year ago. So I'm eager for her to have her own space again. (seriously, can not flippin' wait!)

So as I'm skimming Etsy, I favorite everything that I think would look amazing for the idea I have for her room.  And I, of course, have a Pinterest board dedicated to just her room. {i get a bit obsessive} So here are some images and links of some of the things that I've found!

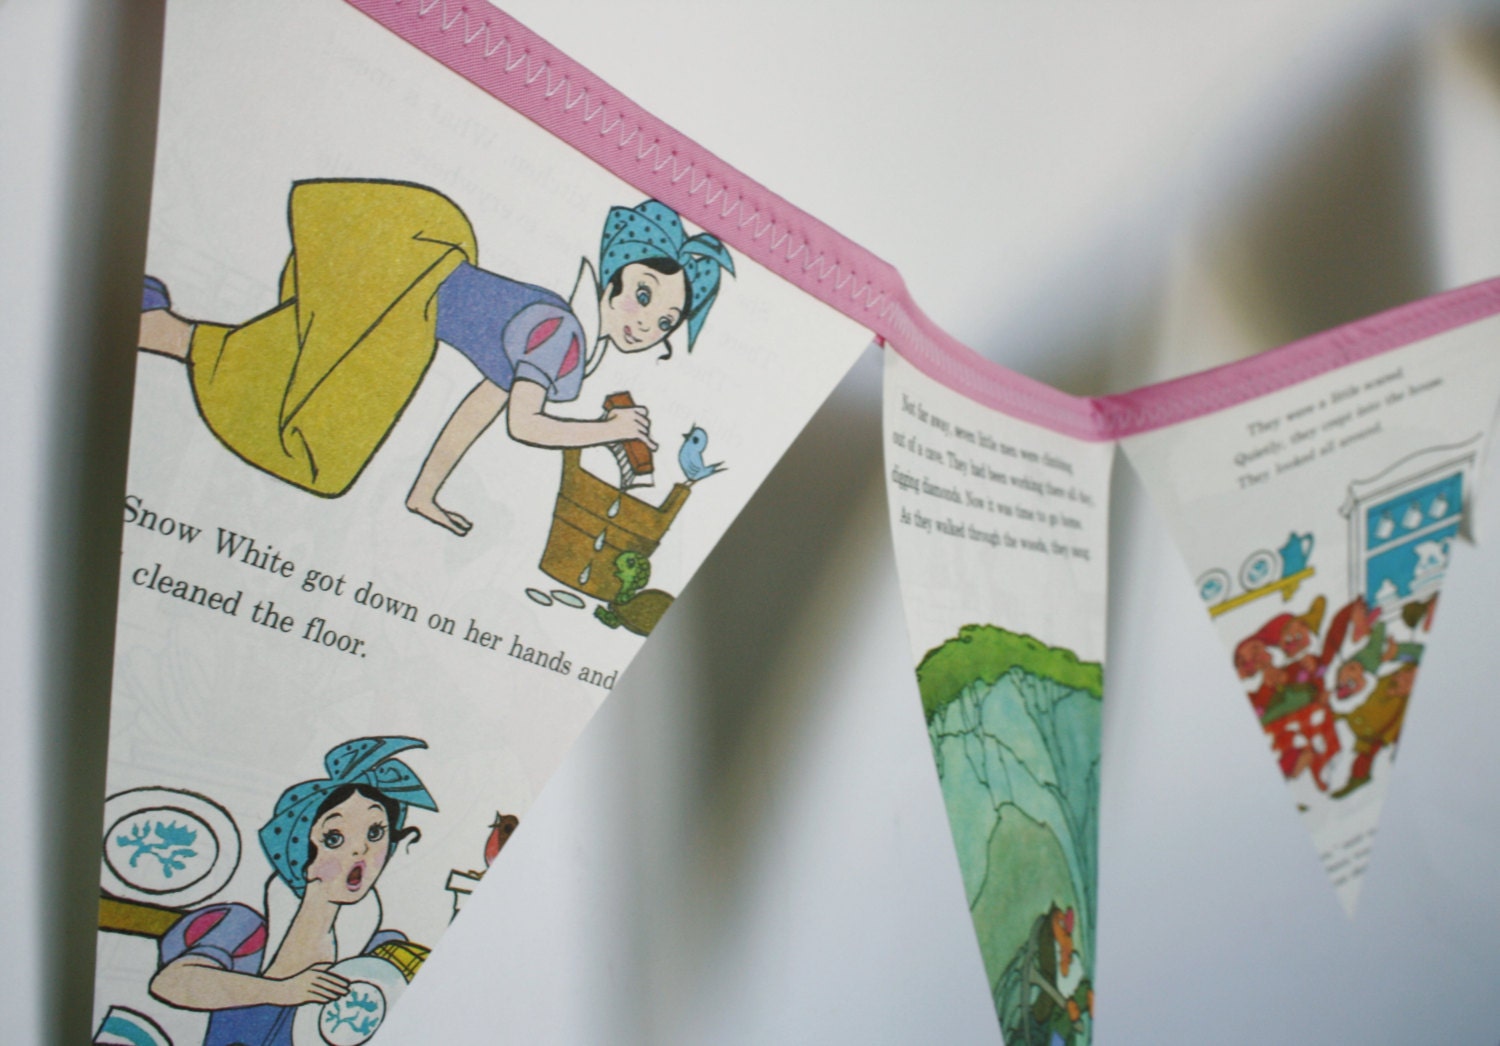
SnowWhite Book Bunting by HomemadeHousewives 

Plush Deer by WonderForest

Wallpaper found on Houzz


Cute little DIY by Moryma.typepad.com

I'm definitely excited to see what else I can find, and even making my own little DIY deer for her room like the one pictured above. I'm thinking about using yellow patterned and light floral scrap paper or maybe even fabric to make it a bit more quality and also match her room. 


What do you guys think of the little inspiration board I started? Or do you know of any other good products out there that you think would be good for her room?! Let me know!! I'm open to anything. :D 


Sunday, July 7, 2013

Cupcakes and Mason Jars.


So as we were preparing for our fourth of July get together, I got a bit crafty. It's just in my blood, I can't help it! As Madalyn watched cartoons, Derek made sandwiches and homemade iced tea, I made the cupcakes and mason jars. The cupcakes were (of course) Red, White and Blue. Making multicolored cupcakes are really easy and simple to do. All you have to do is mix the batter as stated on the box, then separate it into separate bowls, add food coloring and then mix the colors when you put it in the cupcake tin. Granite it's extra work, but it makes for extra cute cupcakes!!


As those were baking, I started making a Mason Jar for all of my friends that were coming with us. It was Derek's idea to put their xbox gamer tag on their mason jars, and they loved it, haha. Here's all you have to do to make custom Mason Jars for any occasion. 


1. Get Mason Jars. I got mine from Michaels and Walmart. If you're buying a lot, I suggest going to Walmart. I got 12 jars for 8 bucks. At Michaels it's a dollar and some change for one, so you'll be saving money.


2. Buy Glass Paint. I got Martha Stewart paints. These were three dollars for one, so it was a bit pricey. But I wanted to make sure that they were washable and weren't going to peal off.


3. Start decorating! Derek wrote some of the names (except for mine…cause I'm greedy) and I decorated them. I like to do something different for each person, and be a bit creative. Luckily they loved them!

4. Bake them! If you don't want to bake them, it takes 21 days for them to air dry completely. So I suggest popping them in a completely cool oven, and then letting bake for 30 minutes in a 350 degree oven. Pull them out and let them cool before touching-- glass is hot my friends.


After they're baked and cool, you can dish wash them and everything! Happy crafting! 


Wednesday, July 3, 2013

Easy 4th of July Craft!

The Fourth of July is tomorrow!! (insert dancing here).

I'm so excited to celebrate our independence of this country. Even if it doesn't feel like it now a days. Sometimes a little "School spirit" will go along way with me. Time to dress up in the Red, White and Blue and have a good time. If you have a little one and want to do a little bit of crafting tonight or tomorrow, here is one easy one to do!


I simply put Madalyn's hand print in blue on the left hand side. You can add cute little white stars on the inside if you'd like. I didn't have white paint though. And then take your fingers and make the stripes of the flag! She loved getting her hands in the paint, and it's a cute gift to give or even hang on the fridge! I hope you guys have a great 4th tomorrow!! 


Tuesday, July 2, 2013

DIY Off The Shoulder Shirt.

Hey Lovelies! 

Do you have any older shirts or t-shirts that you really don't wear too often? Why not turn them into a fashion statement or even an easy beach coverup top! You can easily turn a boring shirt into something better for this summer. Let me show you one way: Off The Shoulder

1. Get the supplies:
- Tee shirt 
- scissors
- marker 


2. Start on the right side of the collar and draw a dotted line along it. As you reach the right hand side, slightly move it to the left of the collar. (This makes the left side fall off your left shoulder) See picture above


3. Start cutting alone the dotted line you just made. 


4. Keep cutting!! 


5. Remove the collar you just cut off. 


And there you have it!! A quick fix for any old tee shirt. Perfect for a summer day out or something quick to just throw over  your bathing suit! You could even tie it up at the bottom and make it cute with a pair of cut off denim shorts! The possibilities are endless really. Happy cutting!!


Wednesday, June 12, 2013

Last day to purchase for Father's day!

Bonjour dolls!!

Today is the last day you can purchase one of my Father's Day cards and have it get to you before Father's day. Of course you can order them after tomorrow, they just won't get to you before Sunday.

My etsy shop has a variety of Father's Day Cards that are sure to make you and your special dad laugh! Take a little peek of what we have to offer for you this year.


Be sure to put your orders in before tonight!! If not, you'll most likely get your Father's Day card by Monday or Tuesday of next week. Either way, these hilarious and cute Father's Day cards are too good to pass up! 

Oh and to all you Fathers, Dilfs and Studmuffins out there…HAPPY FATHERS DAY!!


Monday, June 10, 2013

Working from Home.

Yawwwwwn.

Starting your own business can be a very rewarding, yet very tiring!! I'm talking about, early mornings, late nights, running back and forth to the post office, to home, to the studio, to the store, to online shops. {i'm telling you…it never ends}

But that doesn't mean that a home business doesn't have it's perks. ;)

A nice cup of joe helps me get motivated in the morning to sit down and actually start working on my business. I also go to Pandora and listen to my favorite country station. Plus! I get the luxury of staying in comfy t-shirts and shorts all morning. Digging my Code Name Kids Next Door shirt I found at Goodwill? 


So since I've been working all morning, I decided I'll give you a little peek of what I do on a daily basis for my business. 


My little iPhone 5 sitting on one of my sketch books that I like to draw my designs in. There's a little preview on a "Congrats on Twins" card I'm making (you're welcome). And my GWTW phone wallpaper…I'm a tad obsessed with the classics. 


I got a few boxes at Michael's since they were on sale ($2!) to put my cards, packaging supplies, stamps and other necessities for my business. I'm still getting everything organized and it's certain place. Since I'm not fully moved out of my current living situation, it's hard having everything everywhere. Hopefully in the next month I'll have my own little station set up (where no little hands will be allowed to wander!)


I'm the type of girl that LOVES lists. I make lists for literally everything. So I bought a separate notebook (Michaels for 50 cents!) to keep track of every card that a customer buys, when they bought it, and when I've shipped them out. Just to make sure that I keep everything organized. Again, once my little business station is set up, I'll probably have a better filing system. But this for right now gets the job done and well! 


Since the desk I'm sitting at is currently full {with a desktop computer, sketchbooks, printer, coffee, mac and cheese, sharpies, ect.} I was forced to set up my laptop and little box of supplies on the bed next to me. But hey! Space is space! Aren't Derek's cowboy sheets cute? haha.


Last but certainly not least, what's working from home without the little one constantly getting in your face? She kept asking me to take a picture of her truck. What can I say? My little girl has a thing for boy toys. And I couldn't help but include this in my blogpost. Look at those delicate little hands!


There you have it!
This is a morning in the life of derae art! And how unorganized, messy, and coffee ridden it is! Haha, kidding {not really though}. 

Thursday, June 6, 2013

FIRST SALE CELEBRATION!!

GOOD AFTERNOON!! 

You guys!! It's happened, it's already happened!!!


Only one day, ONE DAY, after opening my Etsy shop I already received not only one, but TWO sales!! I can not tell you how over the top, freaking excited I am right now. With all the card competition out there, it really baffled me that people would purchase my cards (and this fast too). It only gives me hope that I can get this business to bloom and give you guys funny and cute handmade personal cards. 

And I was really surprised at the card that was sold! It was ordered by both customers. 
My "DILF" Father's day card!! It's sure to make your baby daddy have a little chuckle this Father's day. ;)
If you'd like to purchase it, click here.

Feel free to check out all the other cards I have on there! There are cards for Father's day, Birthdays, Anniversary's, Weddings, Congratulations and cards to simply say I love you.

New designs are in the works, so I'll keep you updated on whats new to come. :D
Let me know what you think about these cards or if there's anything in particular you'd like to see.

Thanks for sticking with me guys. So much love coming your way, xo. 


Monday, March 4, 2013

DIY Tanner & Exfoliation

HELLO DOLLS~


It's that time of the year again, S P R I N G !! And when the warm weather hits us, we all want to naturally have a healthy glow and look great in all of those pastel colors, don't we!?

So let's start this glorious season with a diy self tanner! Self tanners can get pretty expensive. Last season I purchased the VS Self Tanner spray and lotion which equalled over $50. And I was about to pick up a self tanner at Sephora the other day, but for $35 it just didn't seem worth it. With Pinterest being amazing as it is, I was able to find a few home remedies, give them a try over the week, and report back to you which ones (I believe) work better.

** BEFORE APPLYING ANY OF THIS TO YOUR SKIN, MAKE SURE YOU EXFOLIATE. 

Exfoliation: removal of the oldest dead skin cells on the skin's outermost surface.

Exfoliating allows the tint from any of the remedies to set deeper into your skin, and last longer!! Without doing this, the color might not set at all, and it's easy! Take your loofa or an exfoliating brush and scrub the dead skin cells off your body. You could enhance this by also using an exfoliating body scrub. 


First off, the cocoa powder in lotion, I didn't even try. You're suppose to mix a bit of the cocoa powder in the lotion and rub it all over your body. But every single person who tried it reported that it was sticky, and didn't go on evenly. And who likes a streaky tan? No one. I don't recommend it.

The second thing was the Tea Tan. This one was an alright solution. If you're really pasty and would only like a little tan, or already tan and just want an extra boost, I suggest this remedy for you.


Take 1 cup of boiling hot water, and let 6 Black Tea bags (I used lemon infused so I didn't smell like tea) sit in the water for about 10-15 minutes. Take the bags out and let the water cool. After it's cool, pour it into a spray bottle or take a sponge and apply it all over your body. Rub it in and let it sit until it's dry. I recommend doing this in the bath tub so you don't get tea everywhere. 

**The result is not a deep super noticeable tan, but it does give you a healthy glowing color. This color lasts for 4-5 days, depending on how well and how many times you've applied it. You can do more than once a day since it is a gradual change in color. 


The method I recommend is the Coffee Scrub Tan


Take 2-3 table spoons of Coffee and mix it with 2 tablespoons of Olive Oil until it looks like a scrub. DEFINITELY stand in the shower when applying this one, it gets pretty messy. Take a handful of the coffee scrub and apply it all over your body. Don't put too much in one area because it will just be a clumpy mess. Rub the color in deeply and let it dry. Then gently wash it off. 

**After I did this, I still looked a little lighter than I wanted. There was a little bit of Coffee Scrub left in the bowl so I mixed it with a bit of water and applied it on my body and just pat it dry with a towel, instead of washing it completely off. This left a golden hue on my skin. Perfection! 


What's better than getting a tan without paying for one?! NOTHING. Especially when the spring/summer season is coming towards us. Have you tried any of these out? Let me know how they worked for you, or you had another secret to share. ;)